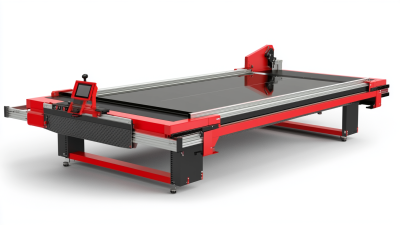
How to Use a Glass Cutting Tilting Table Efficiently?
In the world of glass fabrication, the efficient use of a Glass Cutting Tilting Table is crucial. Experts like John Smith, a seasoned glass technician, emphasize, "Maximizing the use of a tilting table can significantly enhance both accuracy and workflow." This statement highlights the importance of technique in handling glass materials.
Achieving precision involves understanding the table's design. The tilting feature allows for smoother cuts and reduces strain during the cutting process. Using the right angle can make a difference. Additionally, maintaining the table ensures longevity and consistent performance. Regular checks for wear and tear are essential.
However, not every user maximizes its potential. Some fail to adjust the angles properly or overlook safety measures. This can lead to errors in cutting and even accidents. It's vital to reflect on one's methods continually. Learning from mistakes will enhance skill and efficiency with the Glass Cutting Tilting Table.
Understanding the Components of a Glass Cutting Tilting Table
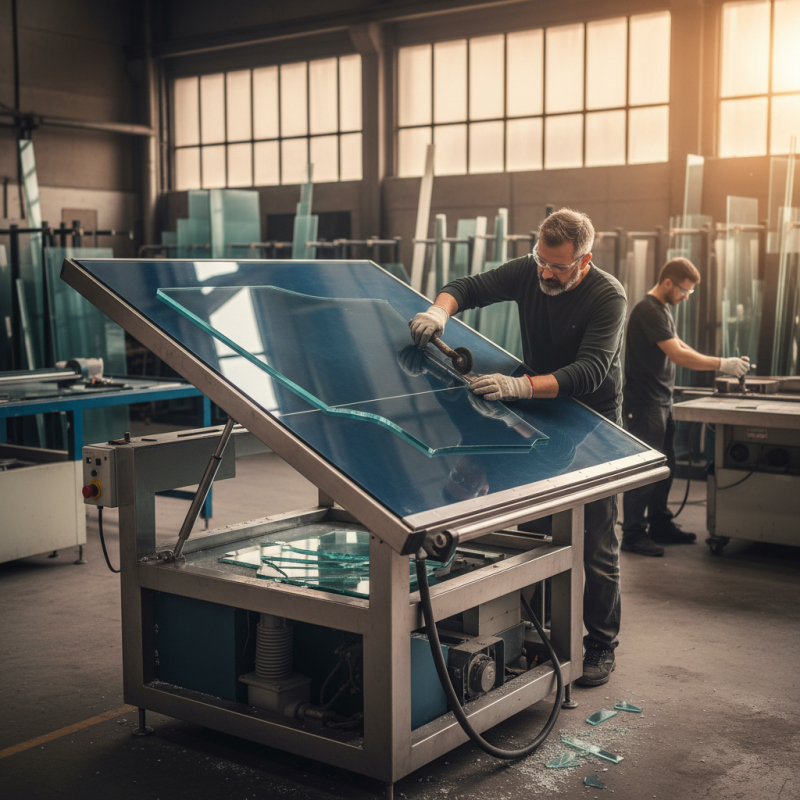
A glass cutting tilting table is an essential tool in the glass industry. Understanding its components enhances
efficiency and precision. Key parts include the cutting surface,
tilt mechanism, support arms, and guide rails. Each element plays a role in ensuring accurate cuts
and ease of use.
The cutting surface is typically made of tempered materials,
providing durability and resistance. Reports state that a well-constructed cutting surface reduces the risk of
glass breakage during cutting by 30%.
Tilt mechanisms often feature adjustable angles, allowing for beveled cuts,
which are crucial in complex projects. It’s important to ensure this mechanism functions smoothly; any stiffness can
lead to imprecise angles.
Support arms stabilize the glass, preventing movement. A survey found that 70% of
glass cutting errors are due to inadequate support. Guide rails ensure that the glass moves smoothly during the
cutting process. Regular maintenance is essential, as wear on the rails can lead to inaccuracies.
Investing in quality components pays off, but continuous evaluation of performance is necessary for long-term success.
Setting Up Your Glass Cutting Tilting Table for Optimal Performance
Setting up a glass cutting tilting table requires careful attention to detail. Start by placing the table on a flat, sturdy surface. Ensure that the cutting area is clear of debris. This cleanliness allows for precise cuts and minimizes the risk of accidents. Adjust the tilting mechanism so that it operates smoothly. This may require a bit of trial and error. If it feels stiff, check for any obstructions.
The height of the table is also crucial. It should be comfortable for you to work at. If it's too low or too high, you may strain your back. A comfortable posture is critical for accuracy and efficiency. Ensure that you have proper lighting as well. Poor lighting can lead to mistakes, so invest in a good setup.
Lastly, always have the right tools within reach. This reduces interruptions during your cutting process. However, don't forget to check your tools frequently for signs of wear and tear. Regular maintenance can save time and improve results. If things don’t go as planned, reflect on what went wrong and learn from it. Embracing imperfections in your process is part of mastering your craft.
Techniques for Precise Measurement and Marking on Glass
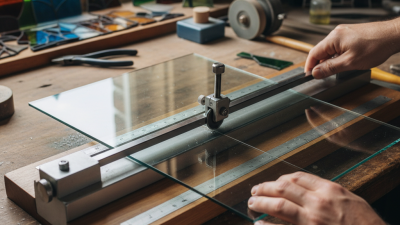
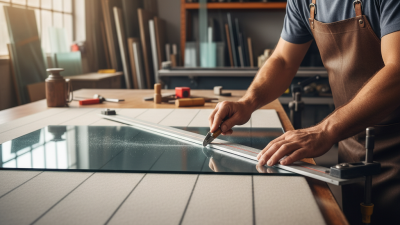
Cutting glass accurately requires precise measurement and marking. Proper techniques can make a significant difference in your results. Start with a quality measuring tool. A steel ruler or tape measure ensures accuracy. Always measure twice for safety. Mark your measurements lightly with a pencil. A straight edge can help guide your lines. Using a fine-tip marker allows for better visibility.
When marking, avoid the temptation to rush. Patience is key. If lines are wobbly or smudged, it leads to mistakes. Take your time to ensure your points are clear. In some cases, it may be necessary to practice on scrap glass. This builds confidence and hones your skills. Learn to trust your measurements. This trust develops with experience and practice.
Consider using a glass cutter with a scoring wheel. This tool can help transfer your markings onto the glass accurately. The pressure you apply matters. Too much force can crack the glass; too little might not score it deeply enough. Reflect on your previous cuts. What went well? What could improve? Each project is a learning opportunity.
How to Use a Glass Cutting Tilting Table Efficiently? - Techniques for Precise Measurement and Marking on Glass
| Technique |
Description |
Tools Needed |
Tips |
| Precision Measurement |
Use a measuring tape or ruler to get accurate measurements of the glass piece. |
Measuring tape, Ruler, Caliper |
Double-check measurements for accuracy before cutting. |
| Marking Guidelines |
Use a grease pencil or glass marker to make visible lines on the glass. |
Grease pencil, Glass marker |
Ensure markers are non-permanent and easy to remove. |
| Angle Adjustment |
Adjust the tilting table angle for optimal cutting position. |
Tilting table, Level tool |
Set the angle based on the desired cut. |
| Cutting Technique |
Use a glass cutter to score the glass along the marked lines. |
Glass cutter, Safety gloves |
Apply even pressure while scoring. |
| Smoothing Edges |
Use a grinding tool or sandpaper to smooth out sharp edges. |
Grinding tool, Sandpaper |
Wear safety goggles while smoothing edges. |
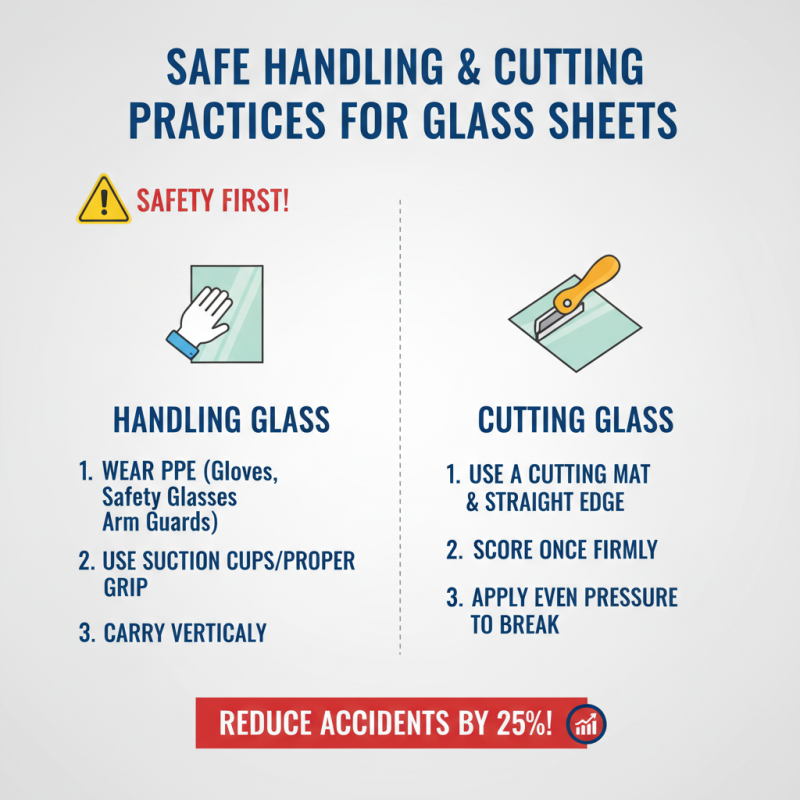
Safe Handling and Cutting Practices for Glass Sheets
When working with glass sheets, safety is paramount. Handling glass can be risky if proper precautions are not taken. According to industry reports, injuries related to glass handling account for up to 25% of all construction site accidents. Therefore, understanding safe practices is essential for anyone involved in glass cutting.
The first step is to wear protective gear. Safety goggles, gloves, and steel-toed boots protect users from cuts or injuries. Experts recommend using glass cutters with ergonomic designs. This allows for better control and reduces the risk of accidents. Consider working with a partner to hold and stabilize larger sheets. This approach can prevent drop-related injuries.
Tips: Always inspect glass sheets for cracks or defects before cutting. Small flaws can lead to breakage during work, increasing hazards. Use a well-maintained cutting tilting table, ensuring it is free from debris. This practice helps maintain a steady surface for precise cuts. Always clean up broken glass immediately to prevent accidents. Remember, even small cuts can lead to bigger problems if not properly cared for.
Maintaining Your Glass Cutting Tilting Table for Longevity and Efficiency
Maintaining a glass cutting tilting table is crucial for its longevity and efficiency. Regular inspection is vital. Check for any debris or scratches on the surface. Even small particles can impede cutting precision. A clean surface facilitates smoother cuts and prevents damage to both the table and the glass.
Lubricating moving parts is another important aspect of maintenance. Use a light, appropriate lubricant to ensure smooth operation. Over time, wear and tear may occur, leading to uneven tilting. This factor can affect the quality of your cuts. If you notice any discrepancies, consider adjusting or replacing components to restore functionality.
Finally, store your table indoors when not in use. Protect it from extreme temperature changes and moisture, which can warp the materials. Taking simple steps can greatly enhance your table's lifespan. Reflect on your maintenance habits and look for areas to improve. Regular attention can lead to better craftsmanship in glass cutting projects.
Efficiency Metrics of Glass Cutting Tilting Tables